Have you ever had a novel with many chapters (my first two novels have over 40 chapters each) and you decide to split chapter 2? Now you have to manually edit chapters 2 through 40 to be 3 through 41. It is time-consuming and annoying. With today’s technology, are there options to automatically do this for me?
Of course, there are options. There are multiple options and in the article, I am going to discuss two of them.
Option 1 – Numbered List
This sounds pretty easy, to just used a numbered list. To make this option easier, create a new style based on Heading 1, and make add numbering to the style.
How to create a new based on Heading 1 with Numbering.
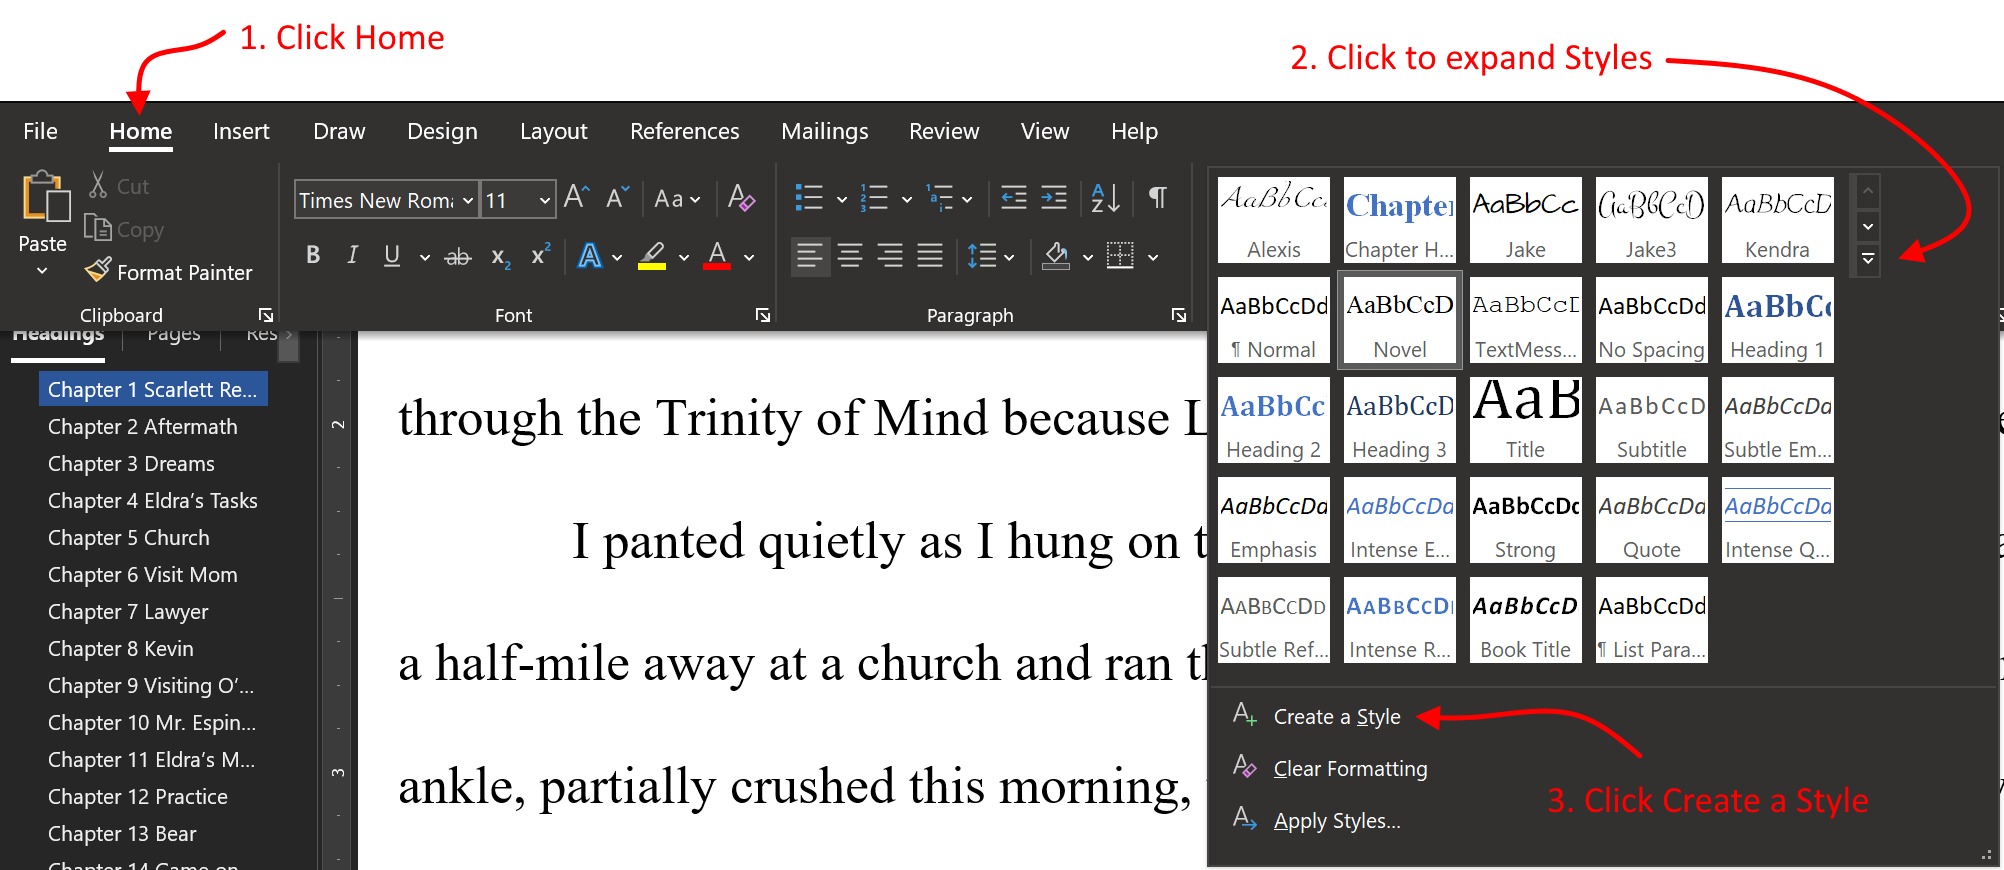
- Click on Home.
- Under Styles, click on the expand icon, which looks live a little v with a line over it.
- Click on Create a Style.
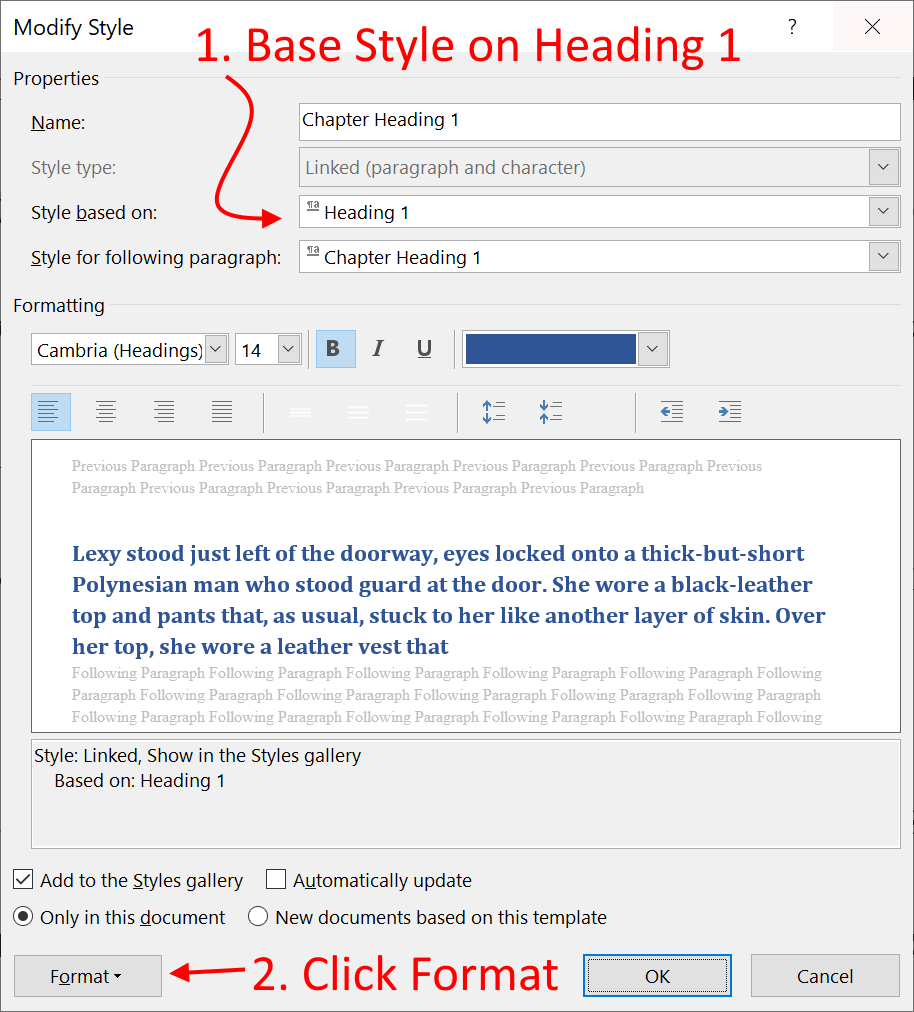
- Name your style Chapter Heading and click OK.
Note: The screen goes away and you style now shows up in the list of Styles. - Locate your newly created style under Home | Styles.
- Right-click on your style and choose Modify.
- Change value of Style based on to be Heading 1.
- Click on Format at the bottom of the screen.
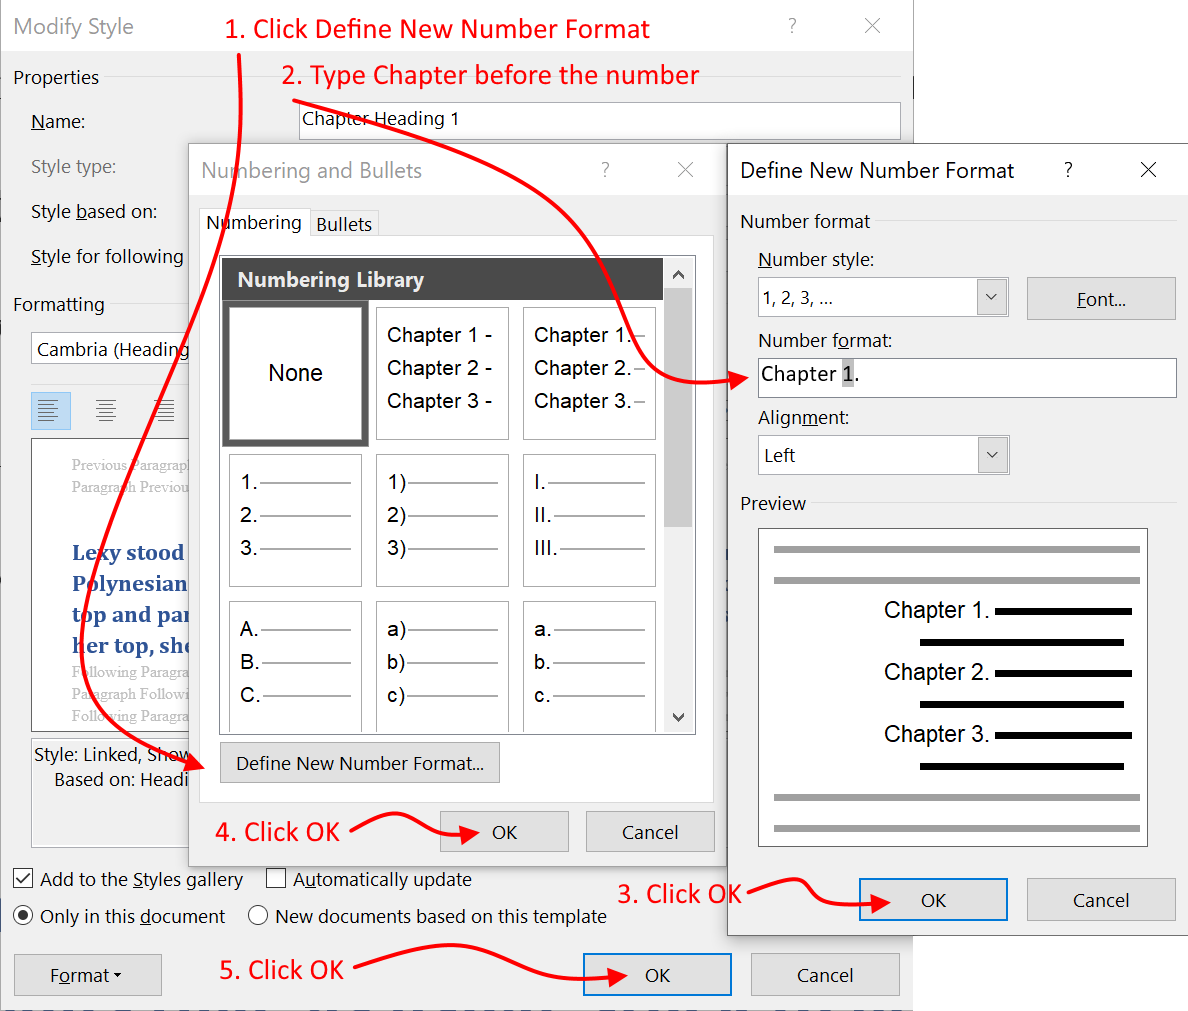
- Under Format, click on Numbering.
- Click Define New Number Format…
- Make sure the Number Style is 1, 2, 3, …
- Under Number format, type the word Chapter before the number 1.
Note: You can choose whether to keep the ending period or not. I removed it. - Click OK to finish creating the new numbering format.
- Make sure the newly created numbering format is selected, then click OK again.
- Click OK a third time. Your style is now complete.
- Now Make all your chapter headings use this style.
- If a chapter heading doesn’t continue with the next number, you can right-click on the chapter heading and choose Continue Numbering.
What if you already have a lot of chapters?
You can change them all with one action.
- Highlight Chapter 1.
- Click Home | Select | Select All Text With Similar Formatting.
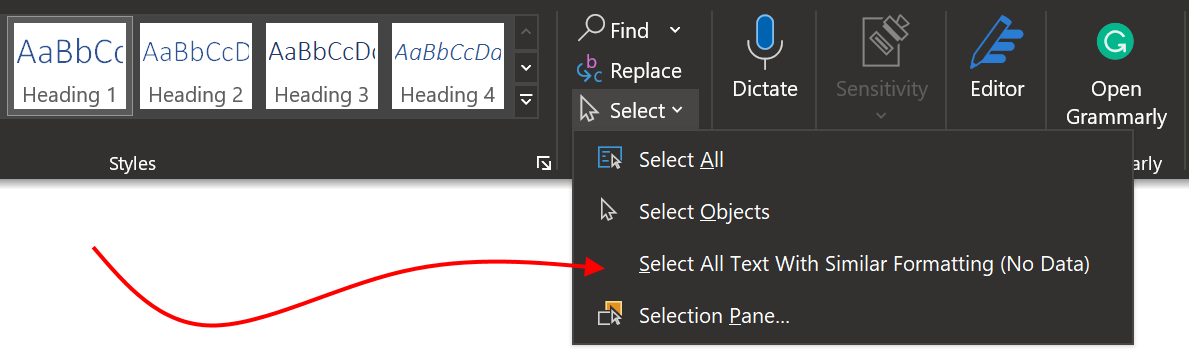
- Click your new style to change all highlighted text to the new style.
Note: Use the Navigation pane to make sure all your numbers are in sequence.
Option 2 – Sequence
A sequence is pretty easy but without reading the entire manual for MS Word, you would never know how to do this.
A sequence is cool because it can exist anywhere in your document.
Creating a Sequence for Chapter Headings
- Find a Chapter heading
Note: If this is a brand new document- Type in the word Chapter with a trailing space.
- Change the Style to Heading 1.
- Delete the number, if there is one.
- Put the cursor where the number was.
- Press Ctrl + F9.
To squirrelly brackets will appear. - Inside the squirrelly brackets, type:
SEQ chapter
The SEQ is a special function.
The chapter text is a name. Any future use will this same sequence name will be incremented.
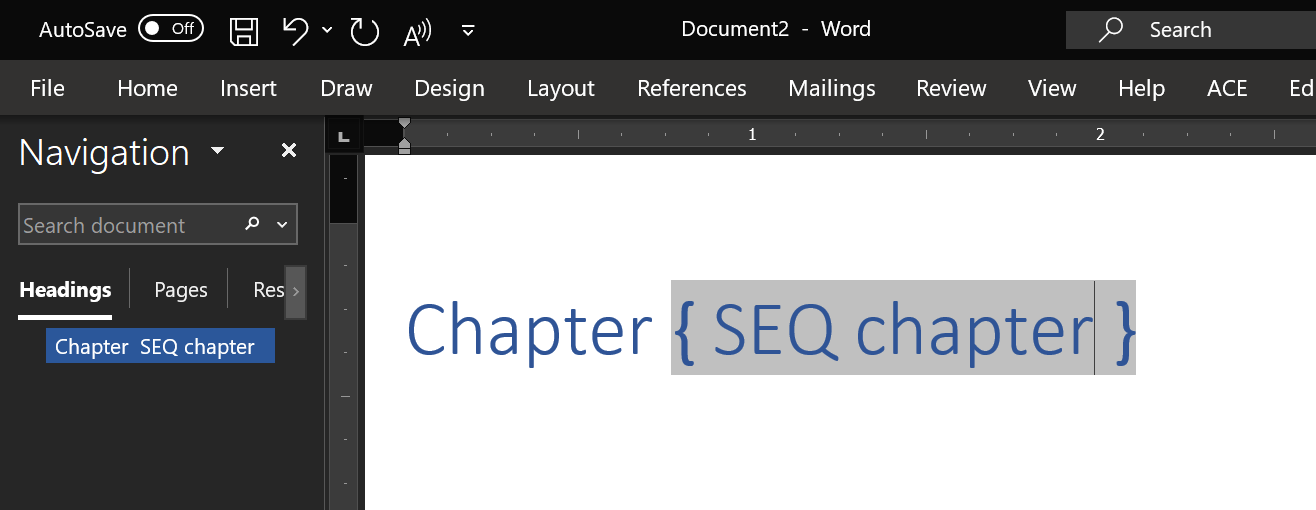
- Press F9.
The { SEQ chapter } changes to be the number 1. - You can copy and paste this into each chapter heading or you can use the above steps, just make sure to always use the same sequence name.
Note 1: You can copy and paste this into each chapter heading or you can use the above steps, just make sure to always use the same sequence name.
Note 2: When you paste a sequence, it may have the original number. For example, if you copy a 1 sequence and paste it, it will still say 1. You must put your cursor on the pasted 1 and press F9 to update it. You can always press Ctrl + a to select the entire document and press F9 to update all sequences.
What if you already have a lot of chapters?
Let’s say you have a lot of chapters already and you don’t want to update them one at a time. You can use Find & Replace.
- Highlight the 1. Only the one. Don’t highlight anything else.
Note: Make sure the 1 is created using the sequence function, and not just typed. - Open Find and Replace.
Note: Pressing Ctrl + h is a shortcut key for opening Find and Replace. - Check the box next to Use Wildcards.
- Enter the following search string in the Find what field.
Chapter [0-9]{1,2}
Note: If you have 100 chapters, you can use:
Chapter [0-9]{1,3} - Enter the following in the Replace with field.
Chapter ^c
Note: ^c is a special replacement that will insert into each replacement whatever is on your clipboard. The last thing you copied (as in copy and paste) is what is on your clipboard.
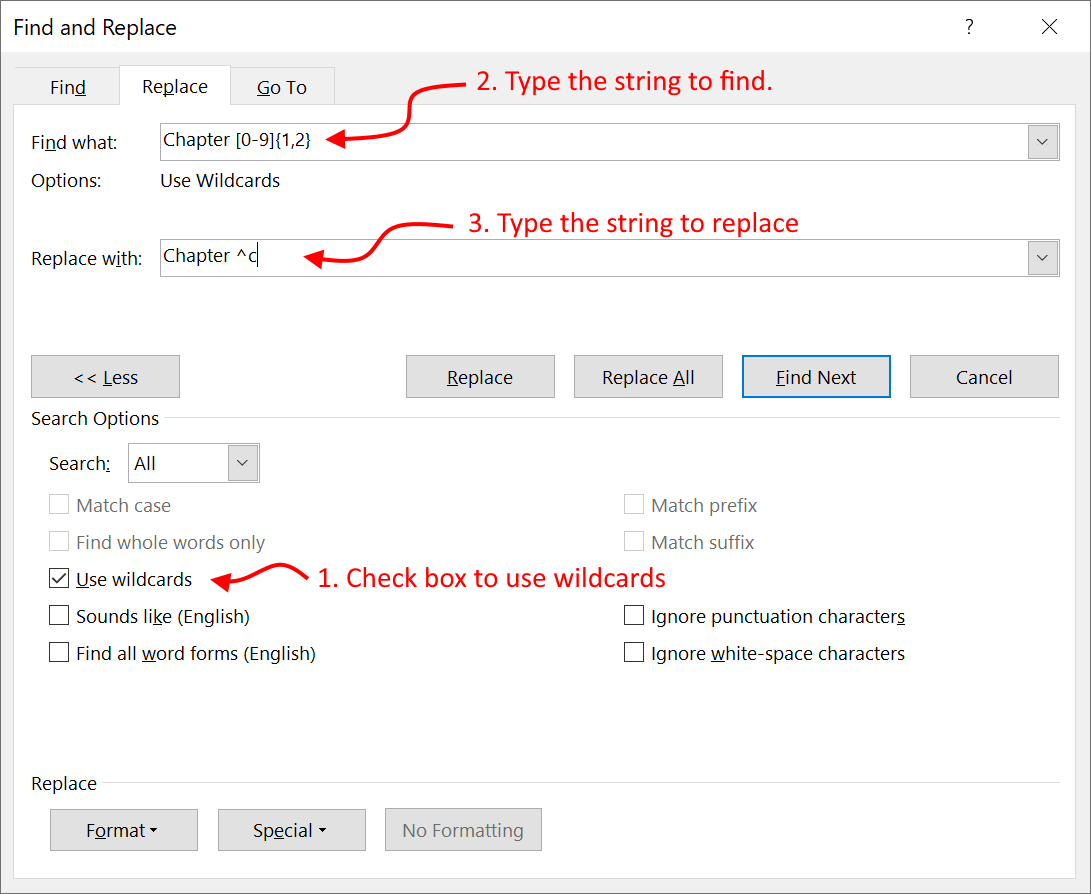
- Click Replace All.
- Note: It will put 1 in all the replacements. Do not fear. The next step will fix that easily.
- Press Ctrl + a to select the entire document.
- Press F9 to update all the sequences.
- Now, every chapter will have its own numbers.