Authors, with this trick, you will never lose your work again
17 Saturday Dec 2016
Written by J. Abram Barneck in Blog Tips, Writing, Writing Tips
Tags
No tags :(
Share it
I remember the moment turned my computer on and noticed it had rebooted. I opened my word document where I was writing my book 2. I’d just sprinted through 2-1/2 the night before. Well, those chapters were just gone. More than 45 pages. As a tech geek, I did some crazy things to try to recover this. I checked the autosave directory. I even pulled my drive and used file recovery software and recovered a dozen or so autosave files. None of them had my 45 pages. It took me weeks to get the motivation to rewrite those pages. I don’t get much time to write, as a full-time (or more than full-time) software developer. I’ve never been more demotivated in my life. I never wanted to feel that way again.
So I came up with a solution that will prevent this from happening again. I came up with this idea on my own but it turns out others have come up with the idea before me, so it is not a new idea.
What is this awesome author-saving idea?
Configure Autosave to save to a Dropbox folder.
Step 1 – Install Dropbox
Go to https://www.dropbox.com to download and install Dropbox. You may have to create a Dropbox account if you don’t have one. The basic level account is free, so there is no fee at all.
Once you have Dropbox installed on your computer, do this:
- Add an Autosave folder to your Dropbox directory.
- Add a Documents folder to your Dropbox directory.
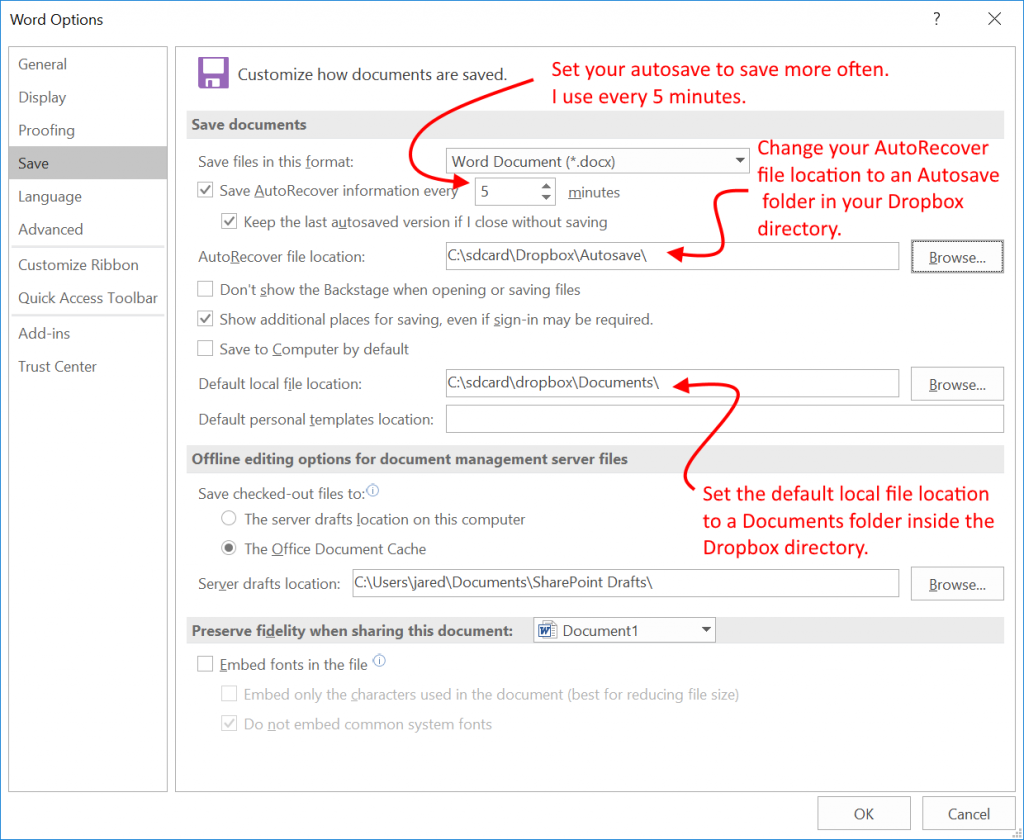
Step 2 – Edit MS Word’s Autosave Settings
- Open MS Word. Go to File | Options
- Select Save on the left of the options page.
- Change the minutes between autosaves to 5 minutes or less. See the image below.
Note: Be careful going below every 5 minutes if you have a large novel. Autosave can freeze MS Word sometimes and interrupt you. - Change the AutoRecover file location to the Autosave folder in your Dropbox directory. See the image below.
- Change the default file location to a Documents folder in your Dropbox directory. See the image below.
- Click OK to save those settings.
Now, even if you computer crashes hard, you shouldn’t ever lose more than five minutes of work.
Test Your MS Word/Dropbox Autosave
Note: You may want to set the Save AutoRecover information every [ 5 ] minutes to 1 minute for this test, then change it back to 5 aftwards.
- Open word and add some text.
- Wait and let autosave happen.
- Add some more text.
- Wait and let autosave happen again.
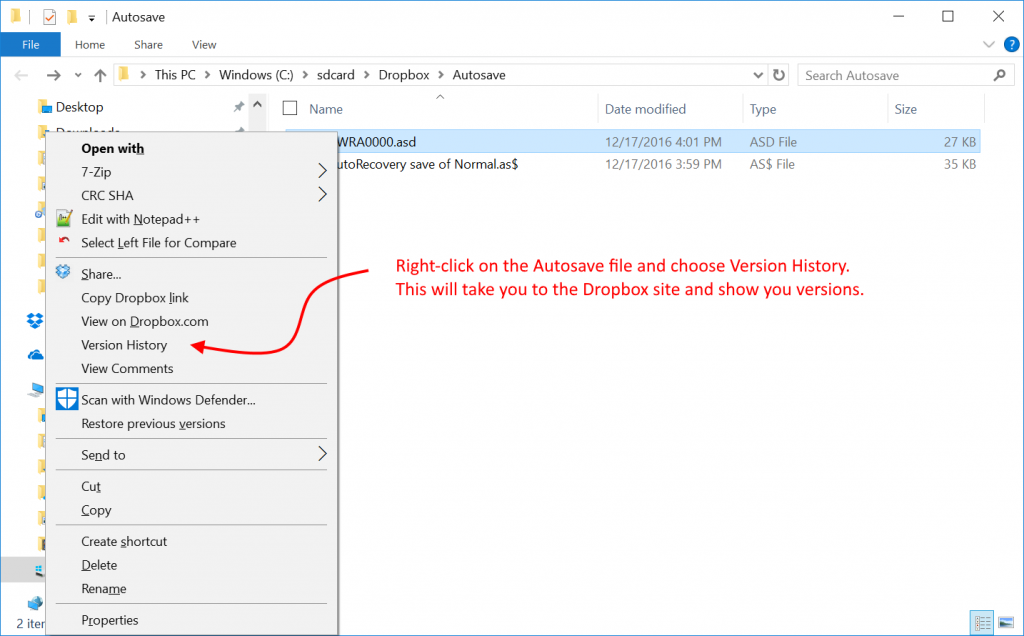
- Now go to your Autosave directory.
- Right-click on the autosave file (you can tell which one it is by the date).
- Select Version History. See image below.
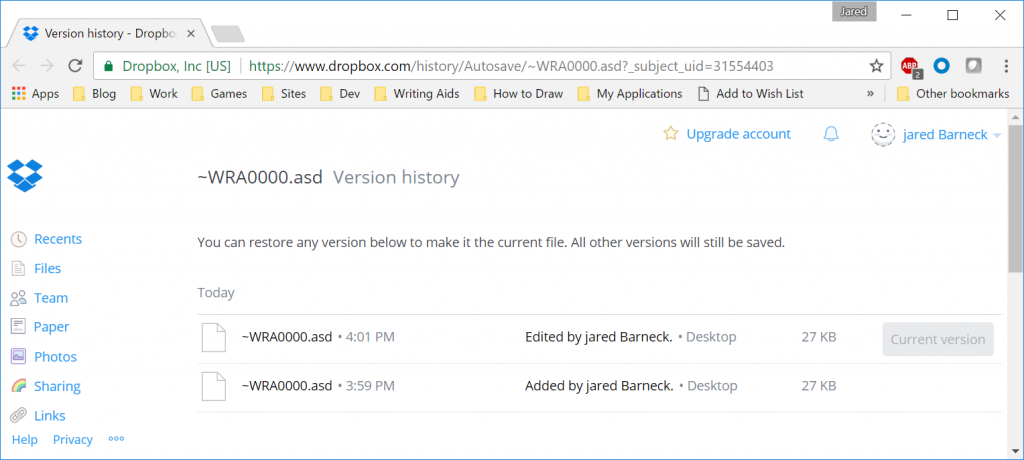
- Once at the Dropbox web page. You will see multiple versions of your autosave file.
- Close Word and chose Don’t save. Now the Dropbox Autosave folder is empty.
- Right-click in the folder and choose View on Dropbox.
- Now on the left, click Deleted Files. You can see your Autosave files are still there.
Note: Dropbox can delete your files permanently anytime, but can keep them up to 30 days.
Programs other than MS Word
I am not going to provide instructions for all the various tools out there. Maybe you are using Libre Office or Open Office. Maybe you are using Scrivener. It shouldn’t matter. All of them have Autosave. You just need to find where to edit the Autosave settings.
Limitations
Dropbox is a cloud service. The means your file is stored on a physical server somewhere in the world. That also means you need internet access. Dropbox only uploads and syncs when your PC is connected to the internet. If you don’t have internet access, then you need to be extra cautious.
To do something similary to this without internet access would be possible. Instead of Dropbox you would use a USB drive or SD Card or other external drive. I could show you how to do a folder sync so your Autosave and Document files are also copied automatically to an external drive, but that is almost getting paranoid. Maybe that would make another article.


